The Inspector consists of the PCN Inspector and the Item Inspector.
PCN Inspector
Next to the logo you will find the Download button ![]() . Use it to download the PCN as a smartPCN container.
. Use it to download the PCN as a smartPCN container.
If the smartPCN has a change history (see pcn.update), you see the button History ![]() . Use it to display the change history of the smartPCN.
. Use it to display the change history of the smartPCN.
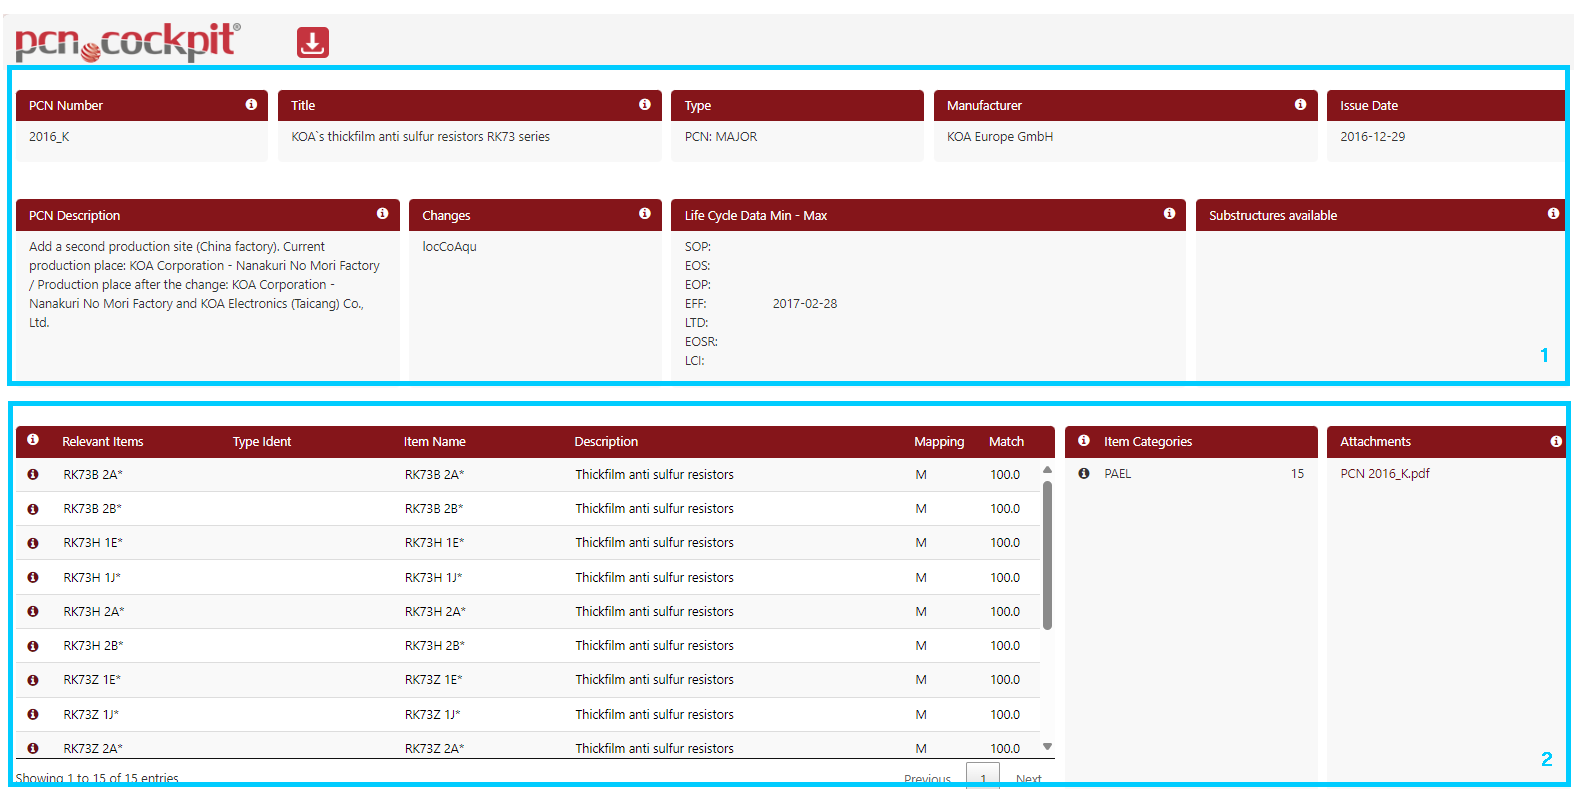
In the upper area (1) you find information about the PCN. By clicking on the buttons ![]() , you see further information to the corresponding entry in a dialog box.
, you see further information to the corresponding entry in a dialog box.
The lower area (2) contains information on the relevant items. By clicking on the button ![]() you receive further information on the individual Item.
you receive further information on the individual Item.
Clicking on the button ![]() (3) next to the header Relevant Items shows further information on all relevant items in a separate window (see Item Inspector).
(3) next to the header Relevant Items shows further information on all relevant items in a separate window (see Item Inspector).
In the area right next to the item list you find the product categories of the items under Item Categories.
In the area at the right end you find the documents of the PCN under Attachments. These are the original documents from the manufacturer. By clicking on the file name you can view or download them.
Item Inspector
After clicking on the button ![]() in the list of items, you get to the Item Inspector. This view is divided into 5 areas. The individual areas and their functionality are described in more detail below:
in the list of items, you get to the Item Inspector. This view is divided into 5 areas. The individual areas and their functionality are described in more detail below:
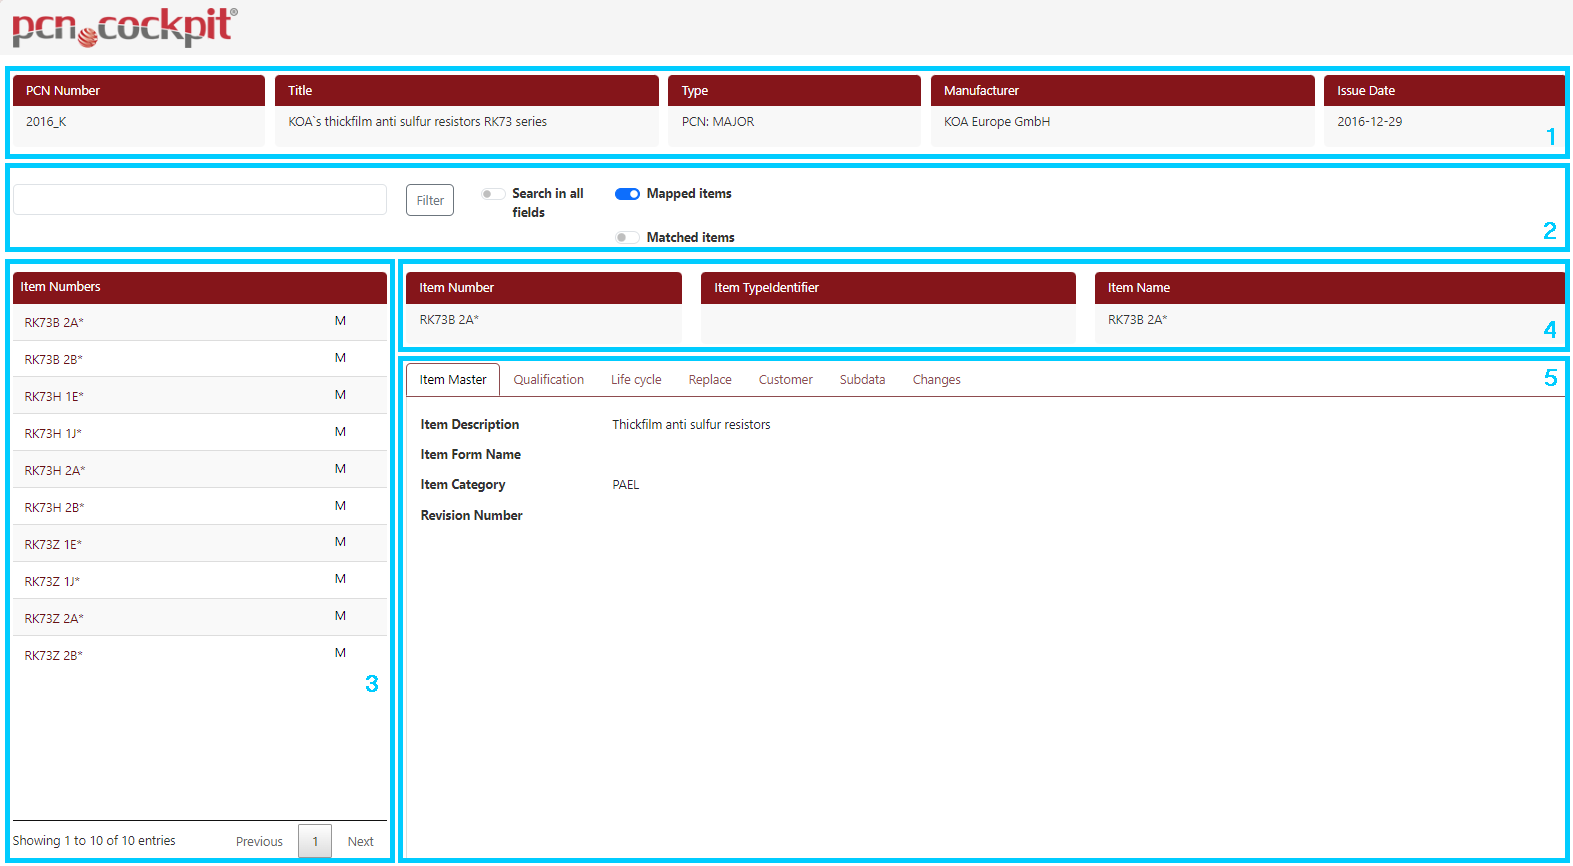
1.Information about the PCN. You see the same information as in the PCN Inspector.
2.This area is used to filter the item list. When opened for the first time, only mapped items (if available) or matched items (if available) are listed. This is indicated by the checkboxes Mapped Items or Matched Items.
Using the search field you can search for a specific item number as well as for all other fields in the items. You control this by checking the checkbox Search in all fields. After clicking the Filter button, the list of items is filtered accordingly.
The link between the checkboxes Mapped items and Matched items is an OR link. I.e. if you set both checkboxes, both the Mapped items and the Matched items will be listed. If you do not select either the Mapped items or the Matched items checkbox, all items will be displayed.
The link between the Search in all fields checkbox and the Mapped items and Matched items checkboxes is an AND link.
3.The items are listed in this area. Mapped items are indicated by the letter M. Matched items are marked by its part-similarity in %. All other items are not marked.
After clicking on an item, the item information is displayed in sections 4 and 5.
4.This indicates the item you have currently selected. You see the Item type identifier and Item Name (see Matched On).
5.In this area all other information about the selected item is shown.