An action workflow is always based on one or multiple complete analysis task.
But to create an action workflow, you do not have to wait until the analysis workflow is completely finished. You can start an action workflow as soon as at least one task of the analysis workflow is completed (Done).
There are multiple ways to create an action workflow:
1.starting from a PCN: in the pcn.analysis list of all analysis workflows from one PCN, find your analysis workflow and click on the action button ![]() at the end of the row
at the end of the row
2.starting from an analysis: in the pcn.tasks list of all analysis workflows find your workflow or task and click on the list button ![]() at the end of the row
at the end of the row
3.starting from all actions: in the list of all actions in pcn.tasks - Overview Action Tasks by clicking on the menu button 
Creating an Action Workflow for a certain Analysis (Workflow oder single Task)
If you want to create an action for a certain analysis workflow, you start in the view pcn.tasks - Overview Analysis Tasks. Here you see a list of all analysings which already exist for the PCN. Done analysings are highlighted in green. Find the analysis for which you want to create the action. It can be any done analysis workflow or task. Click in that row on the button ![]() . You see the view pcn.tasks - Create Action Workflow.
. You see the view pcn.tasks - Create Action Workflow.
The View Create Action Workflow
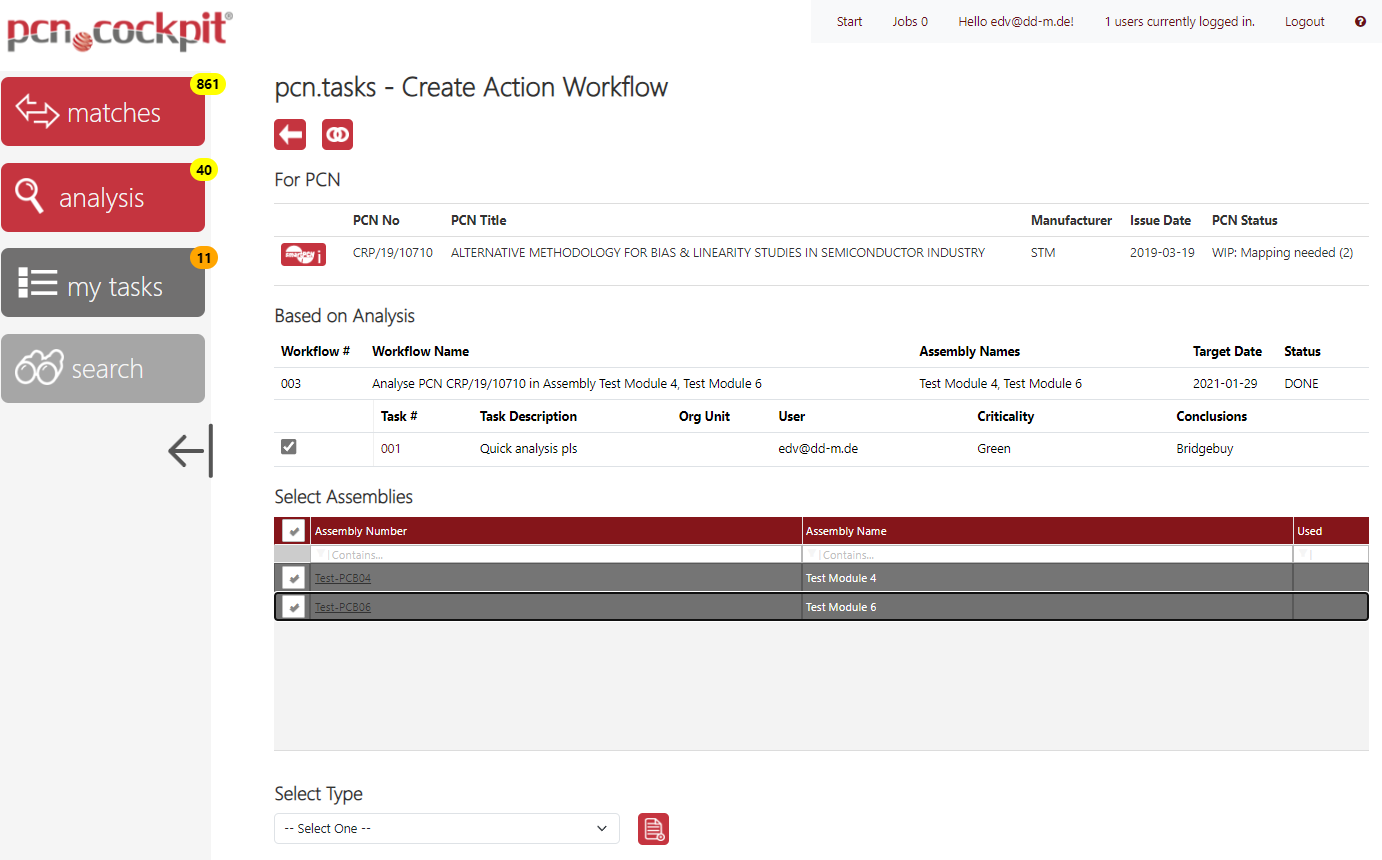
This view shows the PCN header with number, title, manufacturer, issue date and processing status at the top.
Use the button Details ![]() to go to the PCN Inspector in order to inspect all of the PCN's data and may export it into a zip container.
to go to the PCN Inspector in order to inspect all of the PCN's data and may export it into a zip container.
Below, under Based on Analysis you see the analysis workflow along with its tasks which is used as a base for the new action workflow. This is the analysis you chose in the step before.
Under Select assemblies you see the assembly covered by the analysis.
An action workflow is usually made for all tasks of the analysis workflow. However, you can also select a subset. Use the checkboxes next to the task numbers.
If the desired mappings are selected, the next step is to choose the workflow type. To do this, use the Select Type drop-down list.
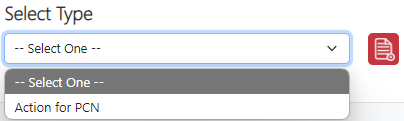
The workflow type defines the basic structure of the workflow (template), i.e. the deadlines, the organizations addressed with the persons behind them and also the number of tasks.
Now click the button Create ![]() next to the selection list. You see the New Workflow along with the default values. You can now edit the input fields.
next to the selection list. You see the New Workflow along with the default values. You can now edit the input fields.
Notes:
•using this method, you create an action workflow for the selected analysis but possibly for multiple assemblies. If you want to create an action workflow for multiple analysis workflows and one assembly, choose the third method (3.) and create the action via the matrix view.
•In the admin area you can create any number of company specific templates, which are then available for selection under Select Type.
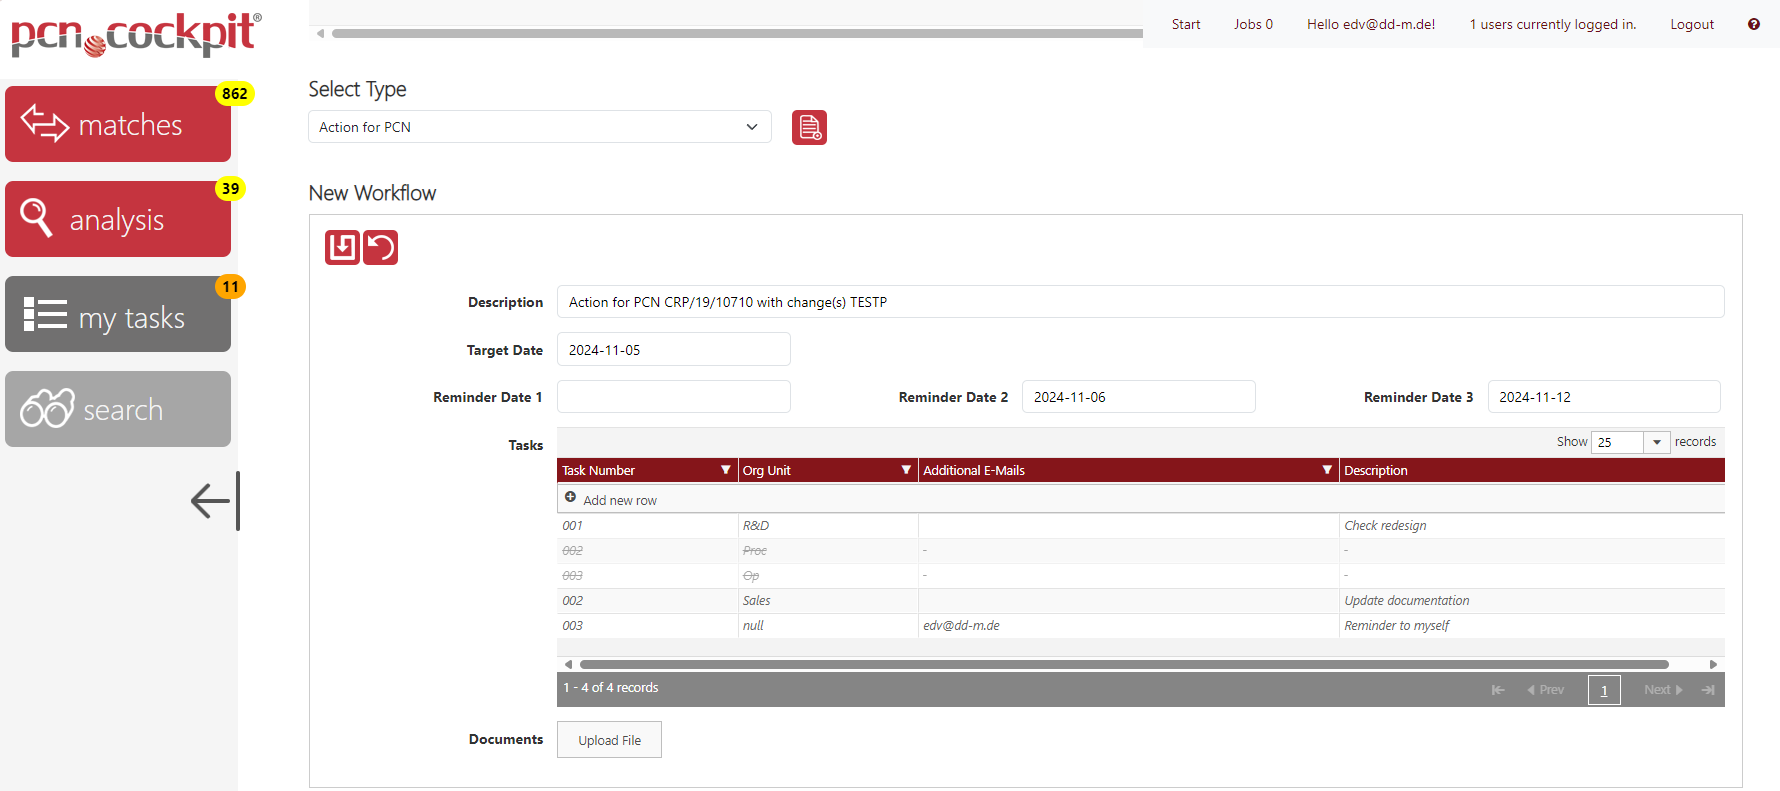
All entries are default values coming from the workflow type (template). They can be changed as desired.
Description
Description of the workflow
Target Date
Deadline for processing the workflow
The dates for the reminder notifications (e-mails) when the deadline is not met (all empty=no reminder).
You can pick a date before the Target Date if you want your addressees to be reminded before the deadline.
Tasks
Here you see all predefined workflow tasks for the respective organizations. For each task, you have to enter a short Description.
If you want to add a task, click the button + Add new row.
If you want to delete a task, move the mouse over the row and clicking the delete button ![]() which appears at the end of the row.
which appears at the end of the row.
All persons of the Org Unit are automatically informed about their task. If you want to inform additional persons, enter their e-mail addresses comma-separated under Additional e-mails. This step is optional.
Documents
Here you can add files to the workflow. These are added to each task and can later be viewed by all organizations in the workflow.
Do not forget to click on the Save button ![]() to finally create the workflow.
to finally create the workflow.
You will then see the newly created action workflow with its tasks.
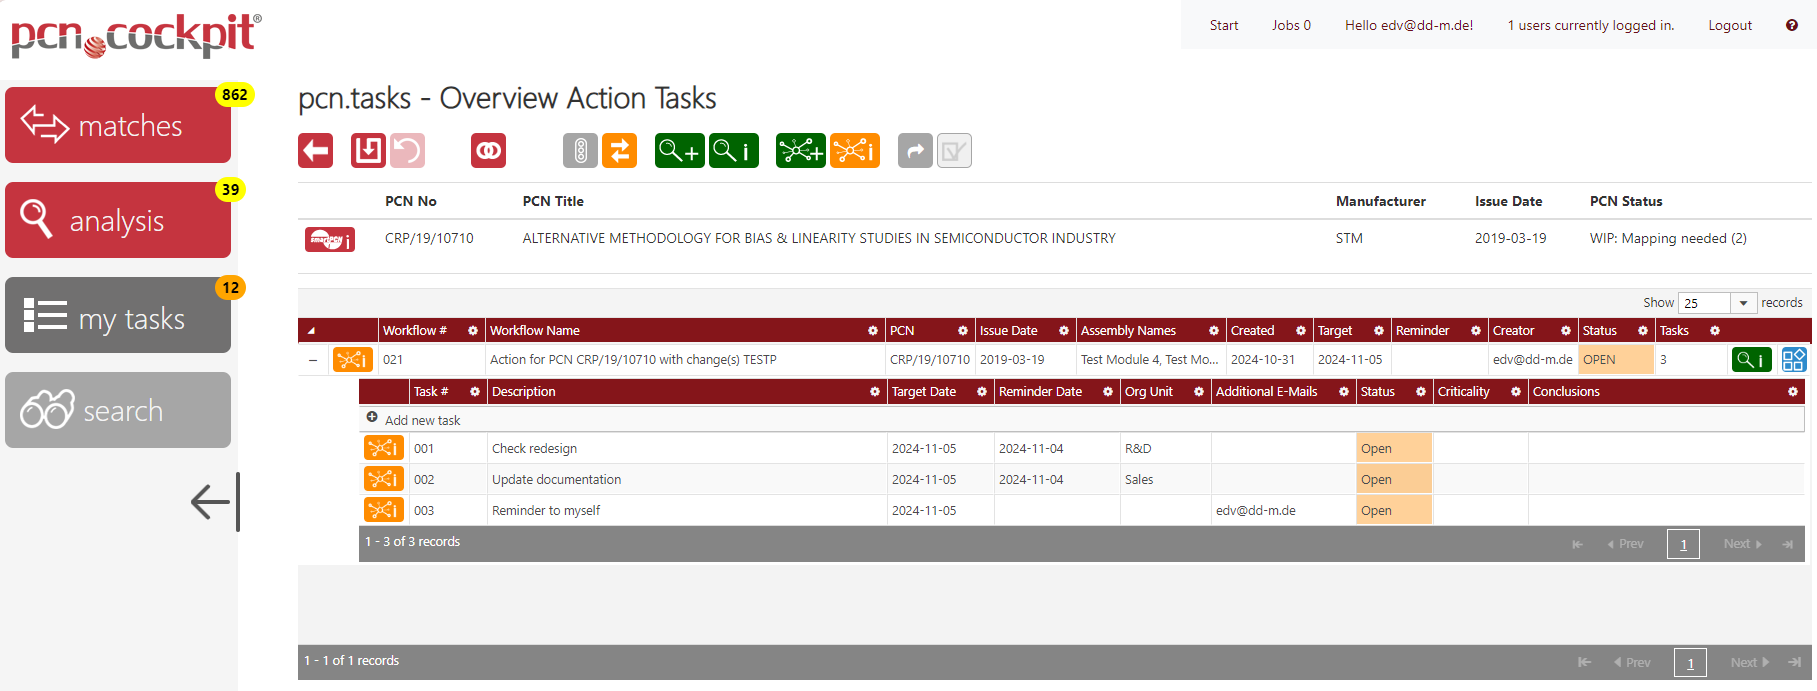
All persons involved see their personal tasks after clicking the button my tasks  .
.
If your license covers the module the E-Mail Notification, the receivers will also be informed by e-mail. Also you, as the creator of the workflow, will be informed by e-mail as soon as one of the tasks is completed (Done).
You can create several action workflows for one PCN. To do this, click the button Create Workflow ![]() here or in the PCN's analysis and perform the steps as described above.
here or in the PCN's analysis and perform the steps as described above.